Starting your first project

Tejas
Last Update hace 4 años
The projects tab is the main page for all your projects. Click Projects -> Project Name to reach here.
Let’s start with explaining each item on this page.
Project Details Page:
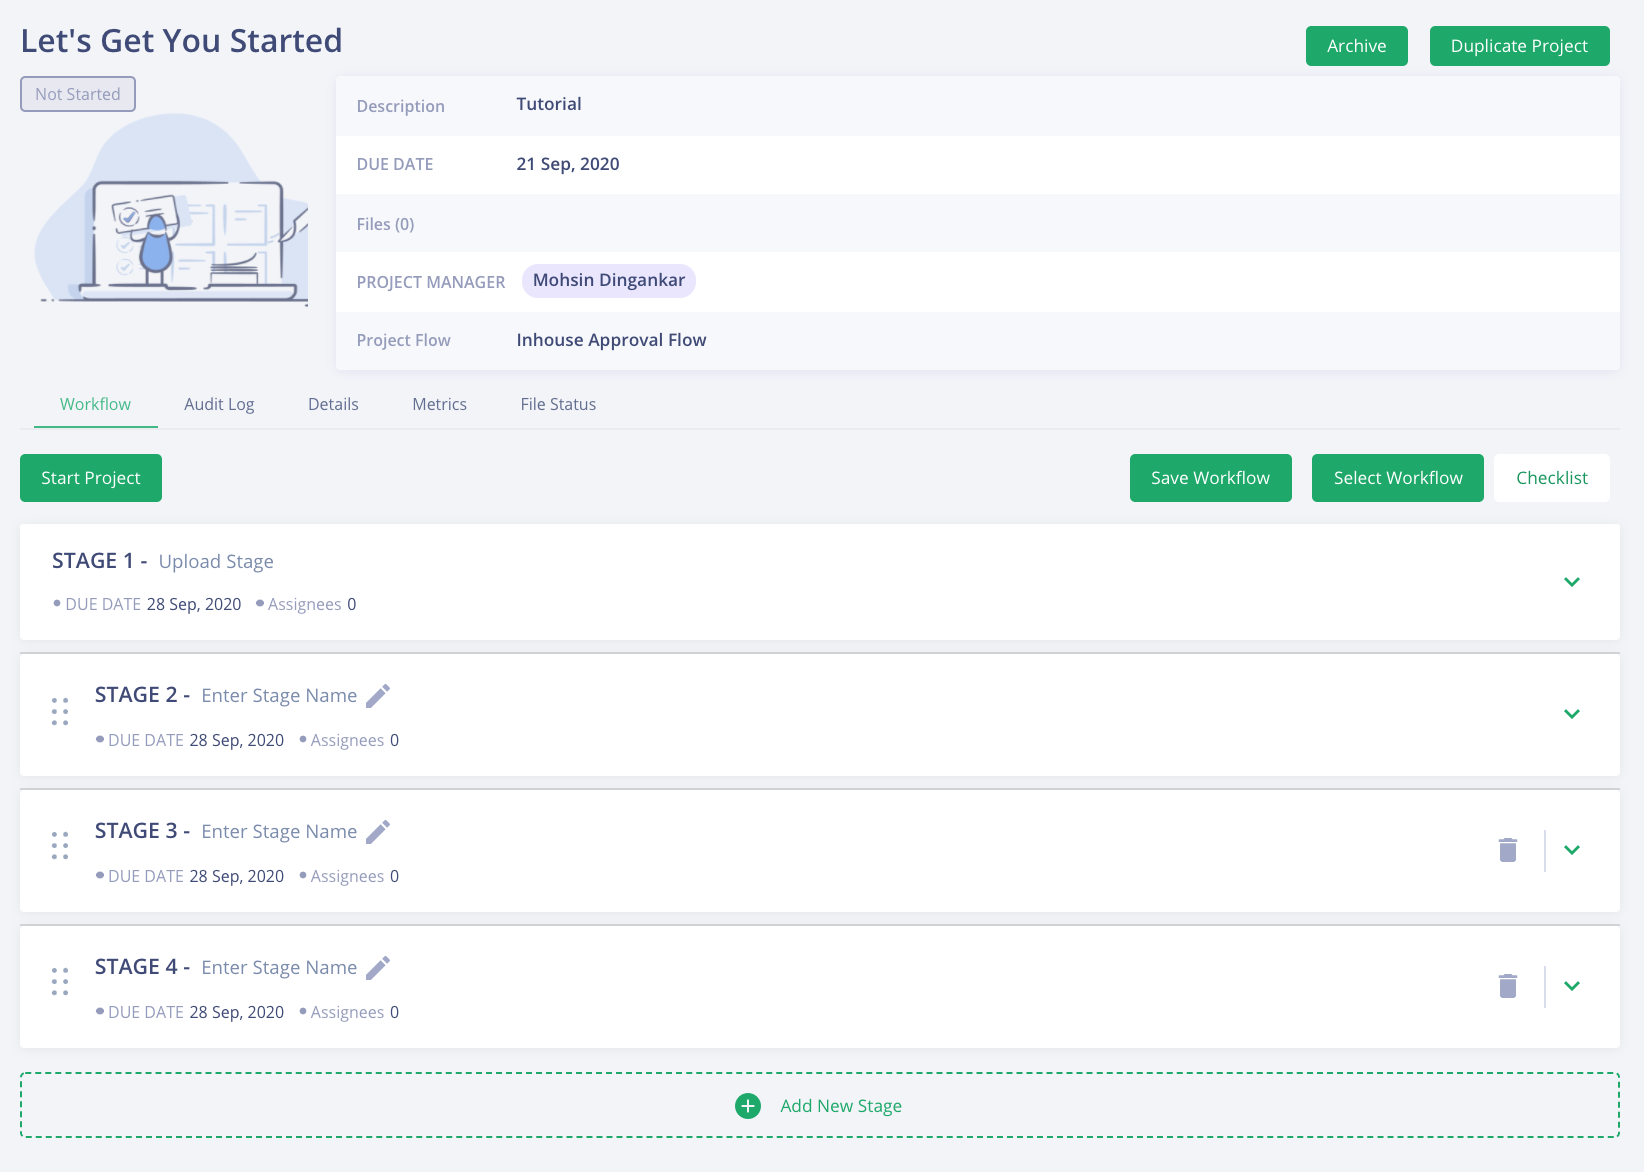
Workflow - This tab allows you to edit your workflow
Audit Log - Provides a comprehensive set of logs for every activity in the project. This includes checklist items approved or rejected
Details - Here you can update your project details and add any reference files for the project. If you want a file updated with simply size instructions, upload the reference artwork file here for your designer
Metrics - All metrics related to the project, including completion rate

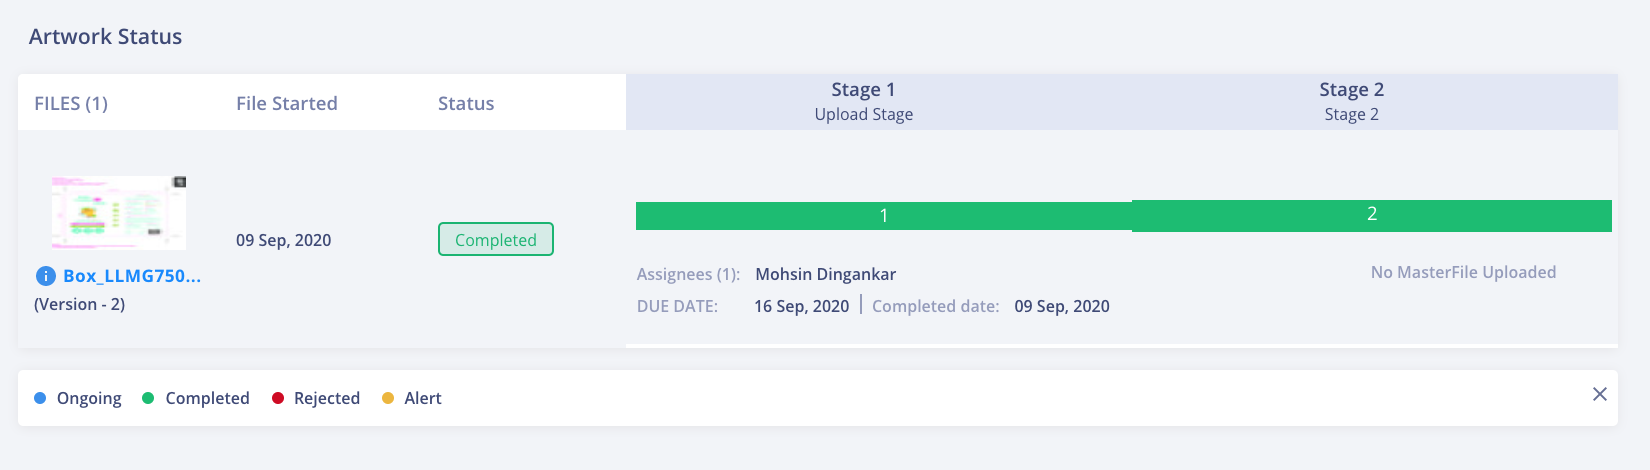
File Status - Want to know the individual status of each file in your project? You will be able to view every file with the stage it is in currently and the stakeholder who is responsible for reviewing it
Add New Stage - By default, Artwork Flow sets up a project with 4 stages. Do you have more stages? Click on Add Stage New Stage at the bottom to configure a new stage. You can have unlimited stages
Save Workflow - If you have created a new workflow on this page, and want to save it for the future, use this button
Select Workflow - If you have an existing workflow and skipped Step 2 of project creation, you can import your saved workflow templates using this button
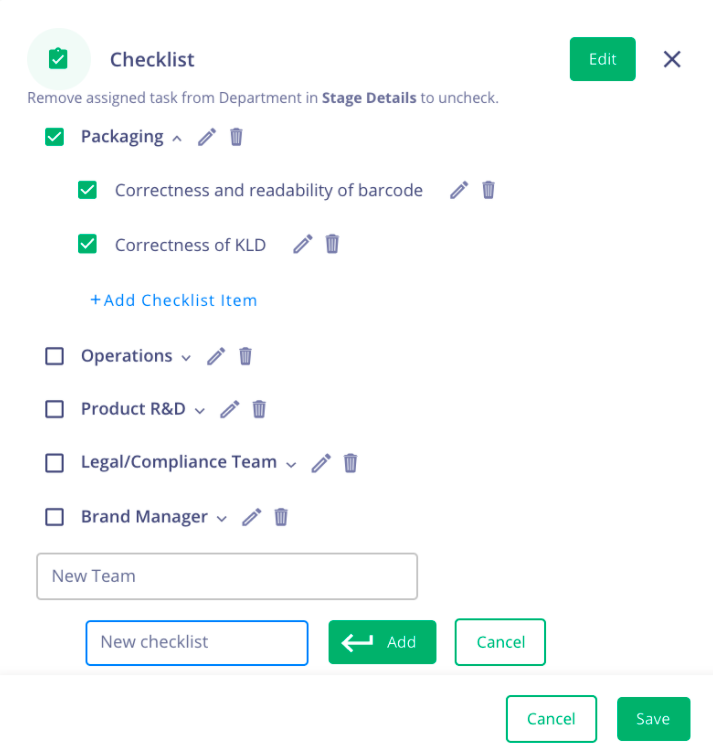
Checklist - Remember adding checklist items while creating a workflow? Forgot a few checklist items? No problem. Simply click on Checklist -> Edit to get add new checklist items
Archive - Created a project but got a few things wrong? Simply archive this project to remove it from your projects list. Note that you can only archive an un-started project or a completed project
Duplicate Project - Created a new project and want to run a similar project again? Click on Duplicate Project, all details regarding your original project will now be available for a new project including workflow, assignees, and checklist items
Start Project - When you are ready with all the above, click this button to Start a Project. Your team members do not receive their tasks until a project is started
Let us now look at how you can tweak your stages
Stage 1 - Upload Stage
Click open Stage 1 - Upload Stage. This is by default the first stage in a project where your internal team will be working. If you work with external agencies, this interface will change a bit. More on that later.
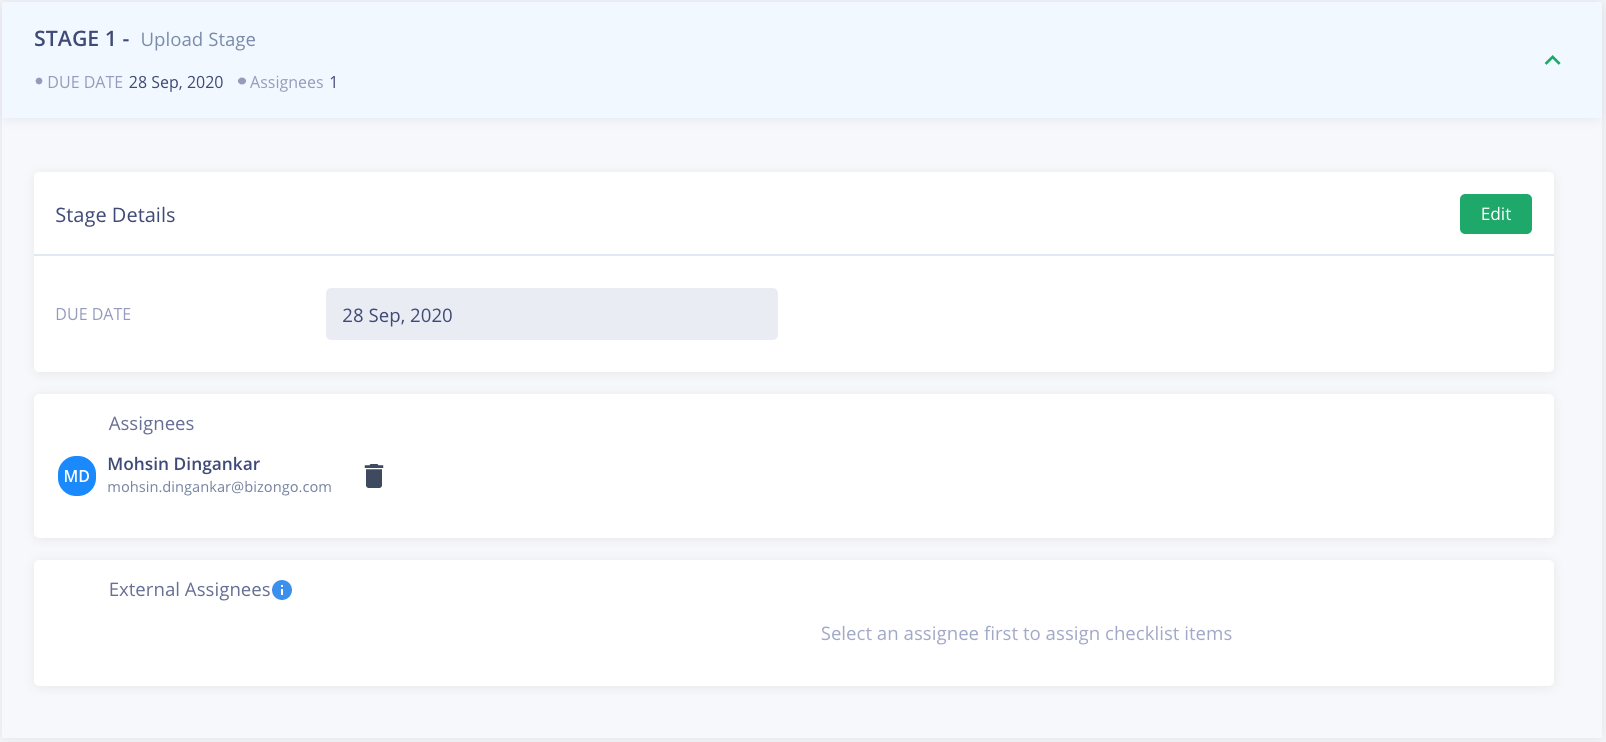
Start off with assigning someone to complete this task. When your project is started, the assignee on this stage will receive the first task to upload a file, you can also be an uploader. Remember ‘Reference files’ under Details? These are the files/documents your file uploader will reference while creating a new file. Your file uploader can be your design team or other team members, you can set it the way you want. The designer or team member can upload this file on their task dashboard to trigger the next stages of the workflow.
What other details can you update on the Upload Stage?
- You can assign this stage to an external user as well. More on that here
- Click on Edit, and update the due date. Artwork Flow by default picks 7 days for this task
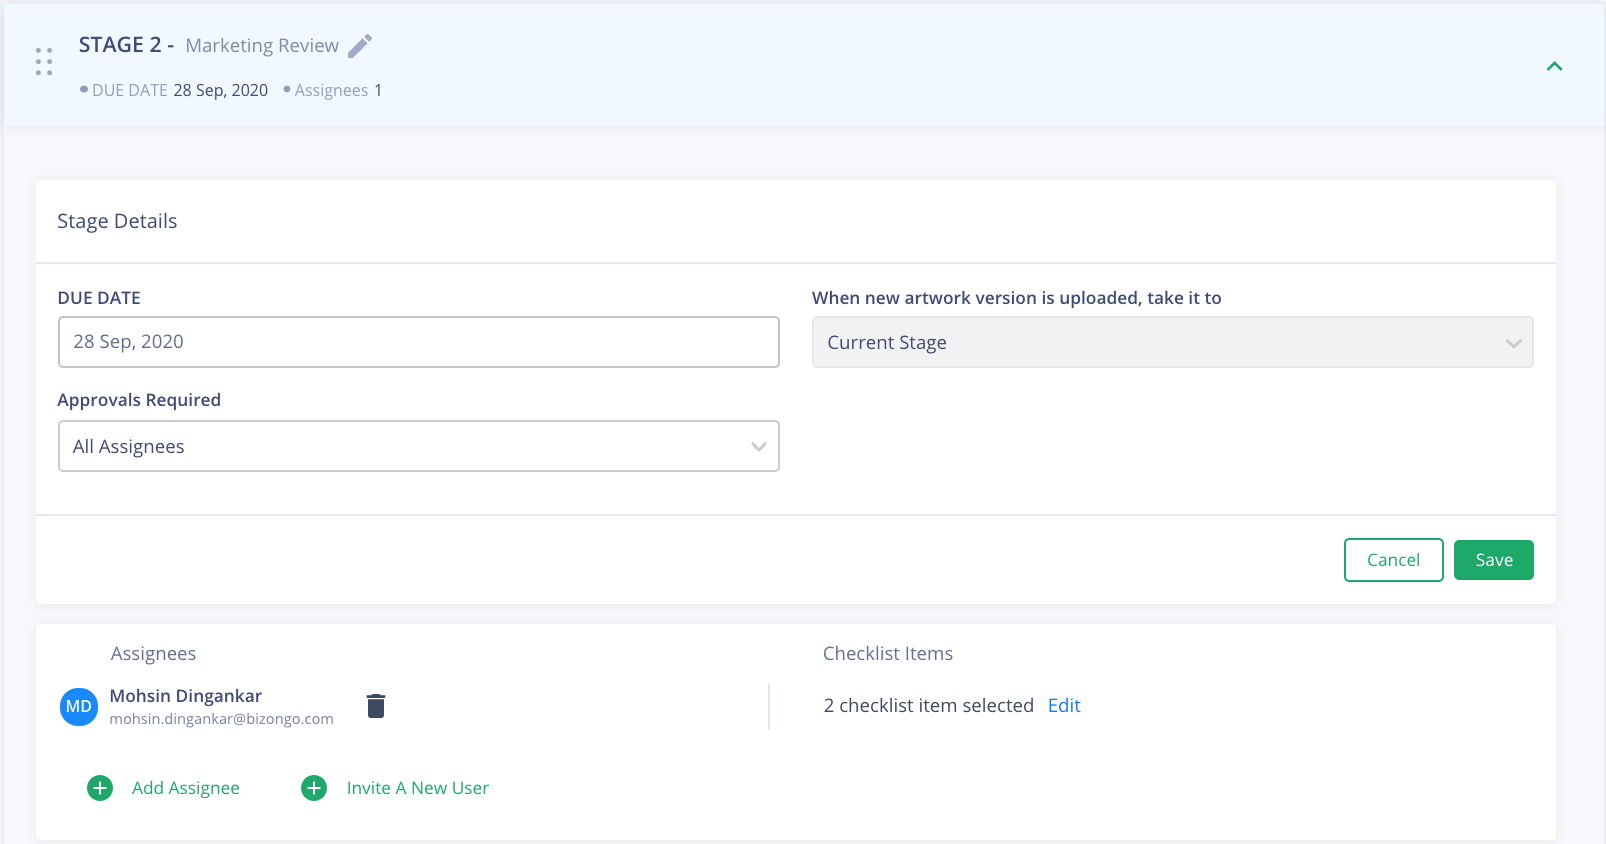
Stage 2 - Stage N:
All subsequent stages are review stages.
What are the items that you should consider while making changes?
- Enter Stage Name - First, set your stage name. It could be as straightforward as Review, but if you have multiple reviewers, it would help to set a stage name. It could be Brand Manager, it could be Marketing Team, that’s for you to decide
- Due Date - Click on Edit. Update the due date as per your requirement
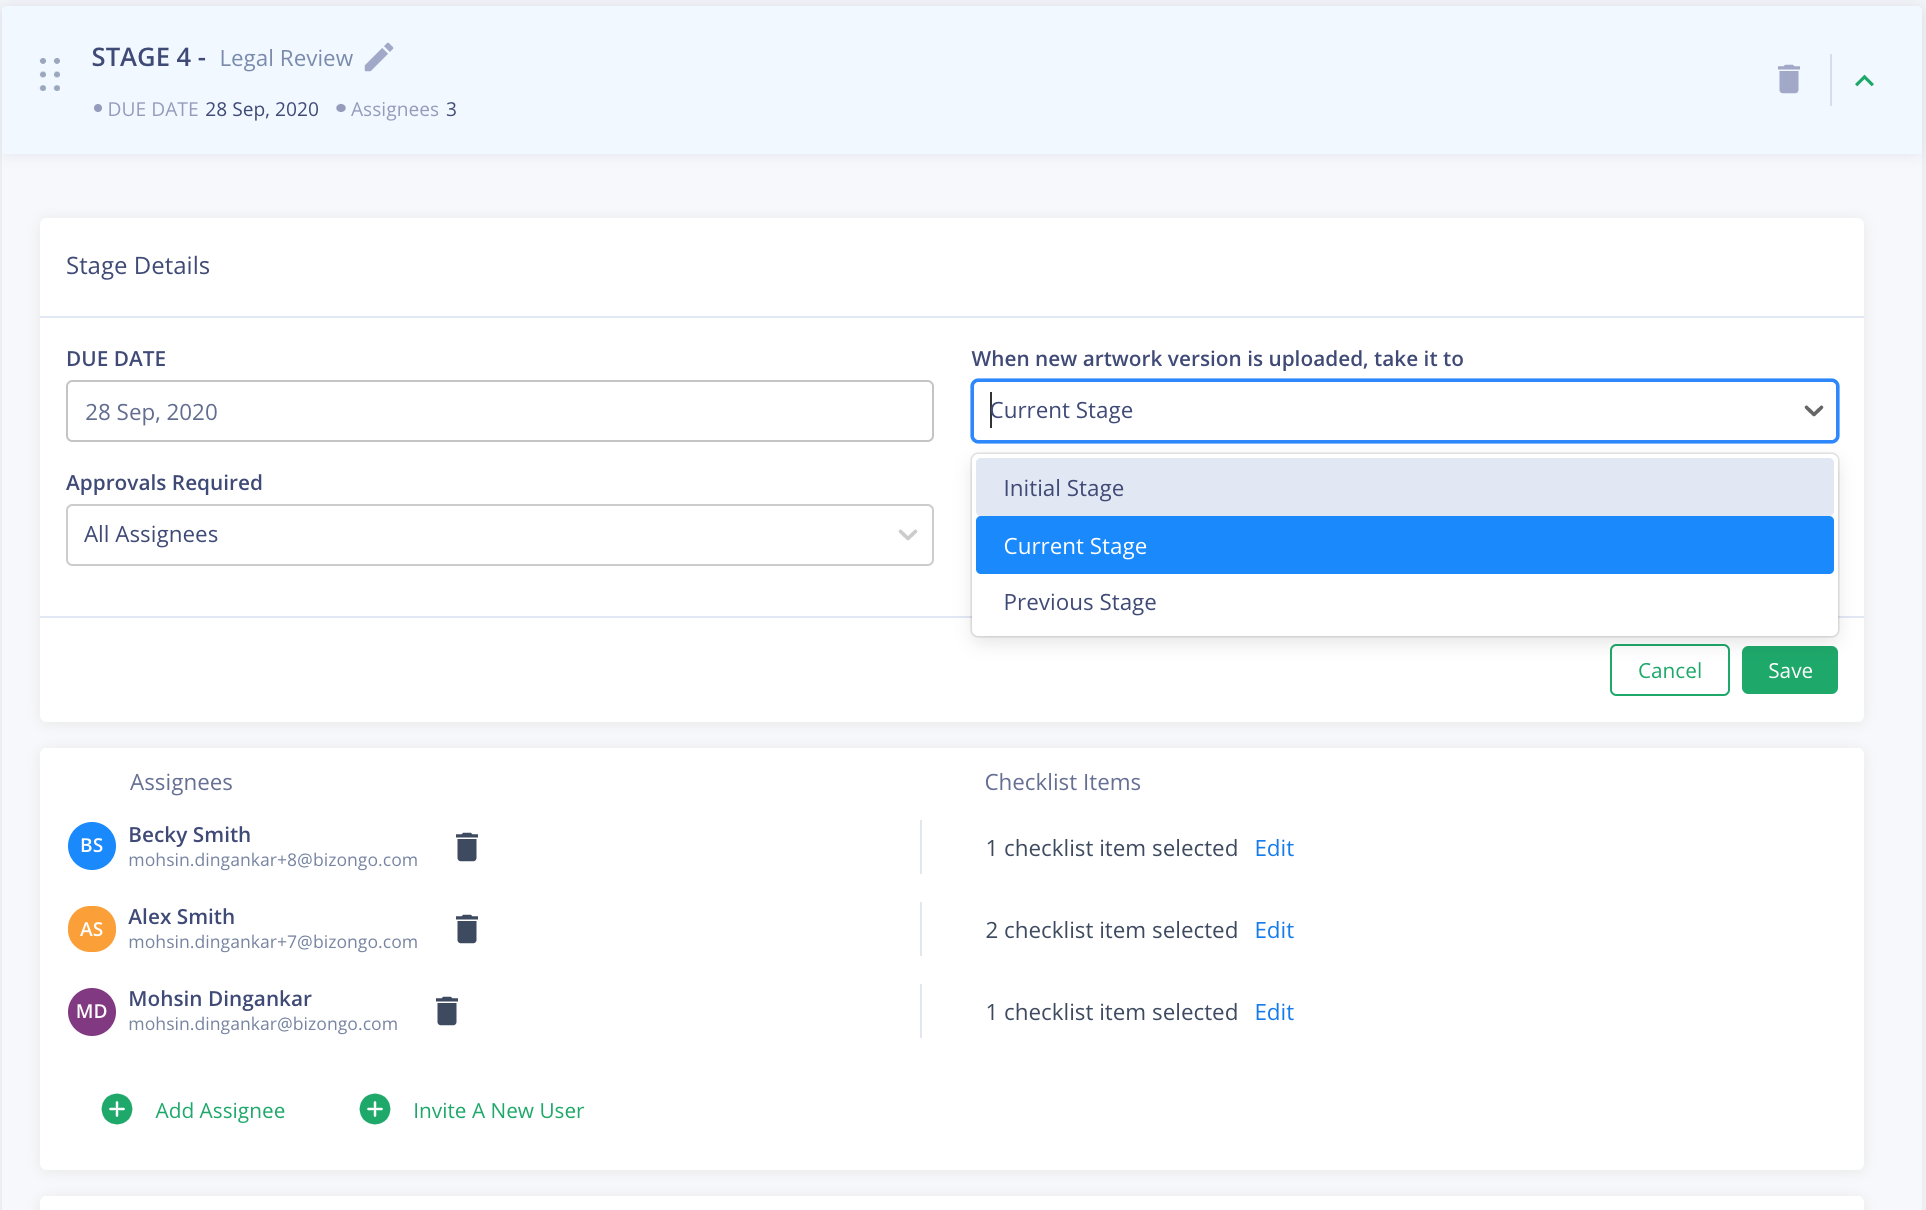
- When new artwork version is uploaded, take it to - This dropdown can have 3 options - Initial Stage, Current Stage and Previous Stage. This is to set your workflow rules in case a file is rejected and a new file is uploaded by your designer. Let’s break that down a bit.
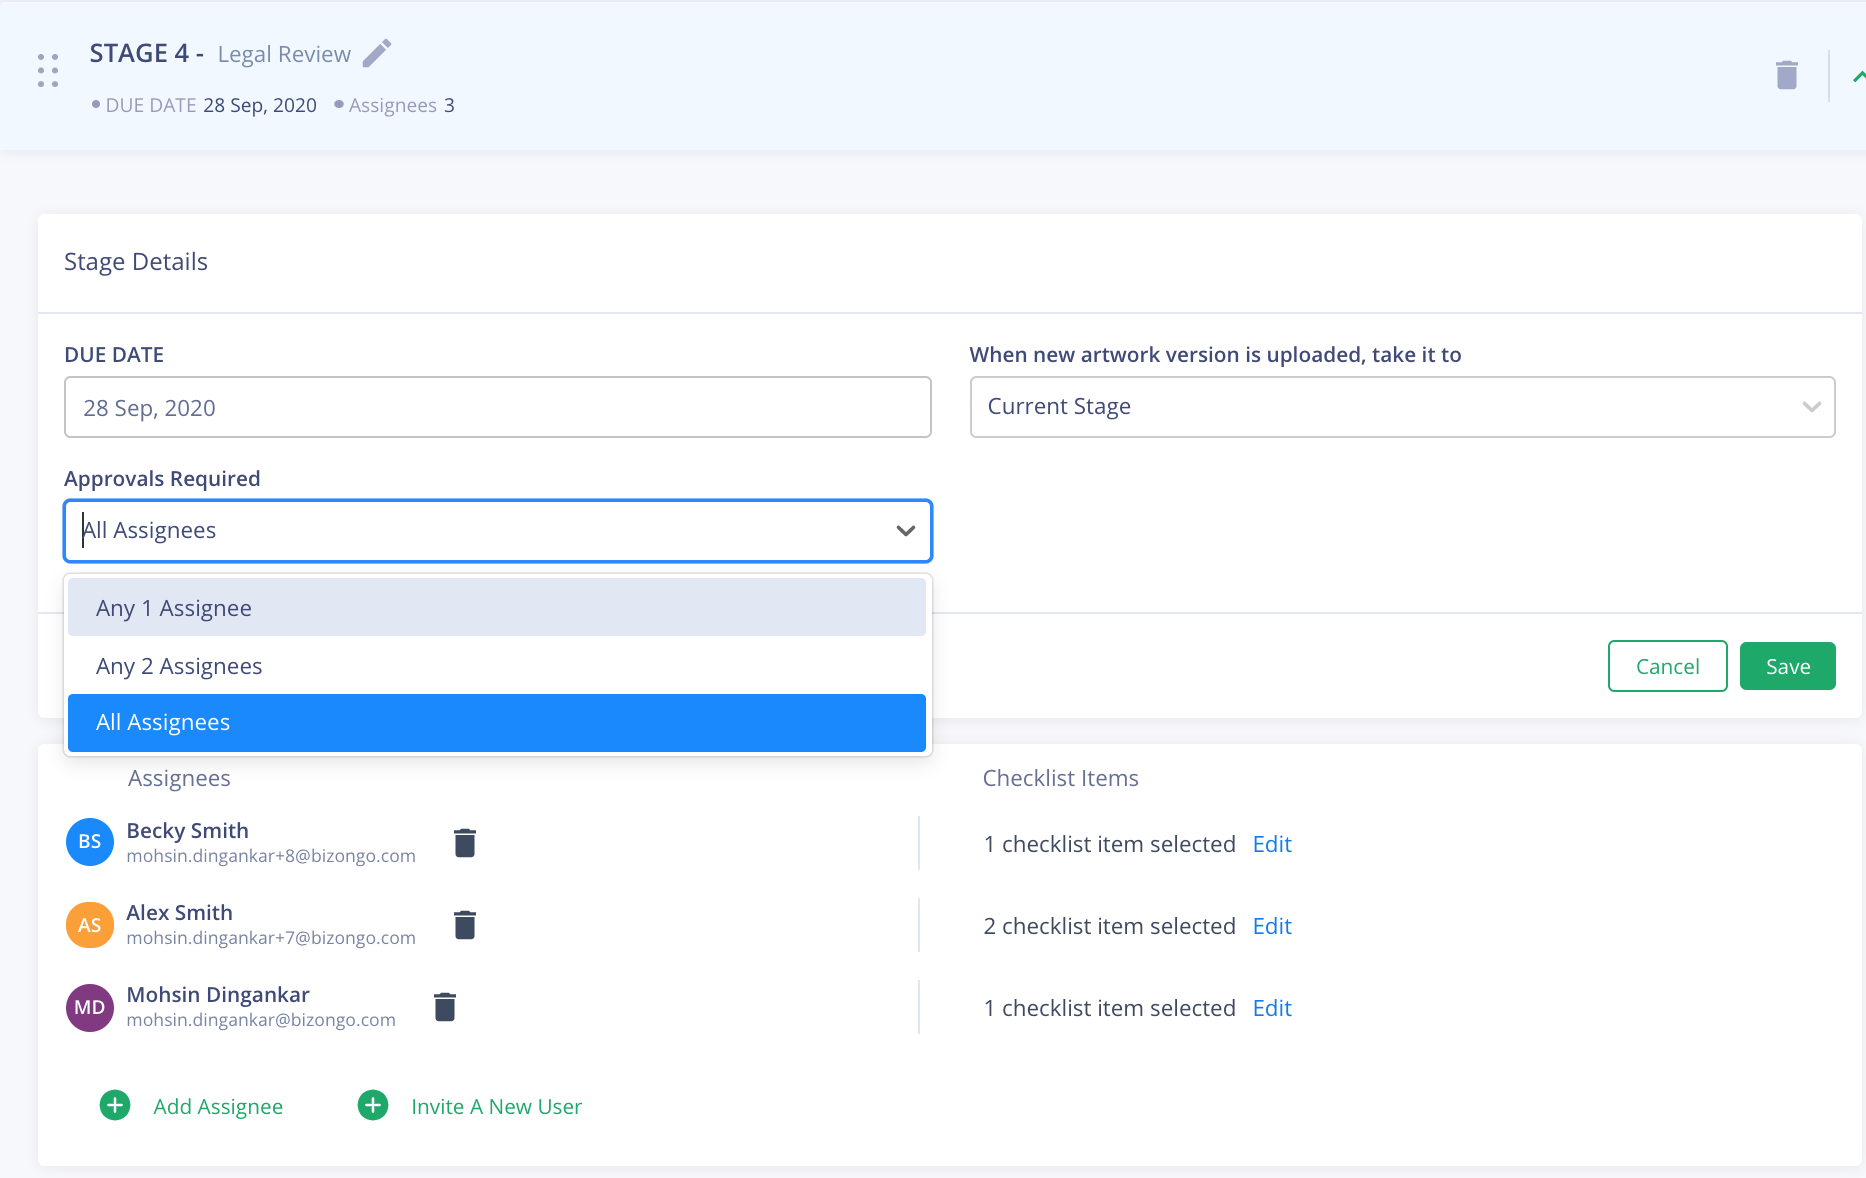
- Approvals Required - If you have multiple assignees at a given stage, you can set rules for how many approvals are required to clear that stage.
- Invite a New User - Started a project, but forgot to add users to your team account. Select this button to directly invite one of your teammates to your project and account without having to navigate away
- Add Assignee - Invite single or multiple assignees on any given stage. If you have parallel assignees, a task is generated for all users on the stage at the same time. Parallel workflows are best used by organizations where feedback from multiple teams is taken at the same time. Sequential workflows are used by organizations where there are clearly identified review buckets and a file moves from one team to the other
- Checklist items - Remember the checklist items that you selected or created in a workflow or even from the top of this page? Now it is time to assign these to specific users. When you have assigned a user on a stage, checklist items get activated and you can select the specific item for the user. Feel free to reuse checklist items.
A simple checklist before you start your first project:
- No. of assignees on your team = No. of stages (for purely sequential workflows)
- Have you added checklist items for your team to approve?
- Have you added any reference files for your team mates?
- Have you set the due dates correctly?
- Finally, remember to ‘Start Project’
Happy Artworking!